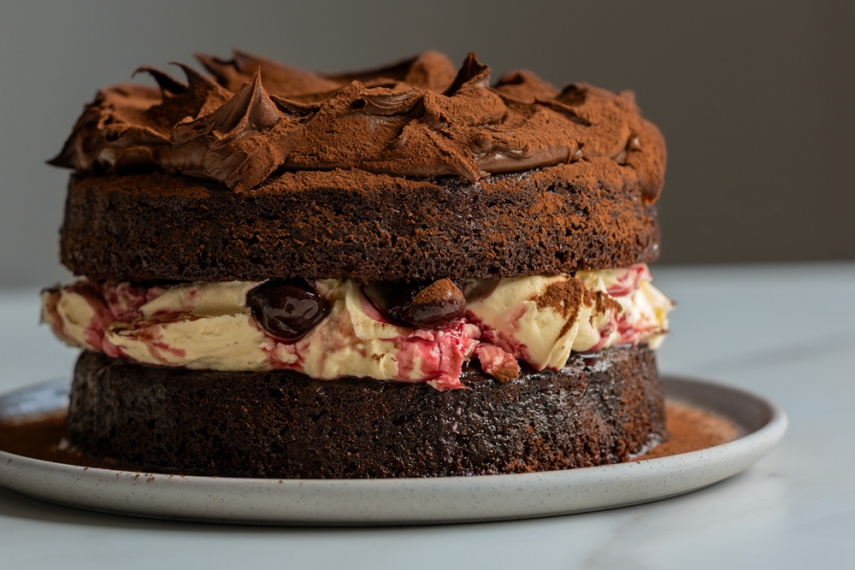
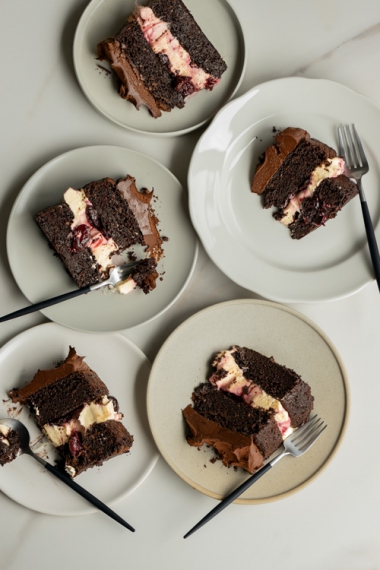
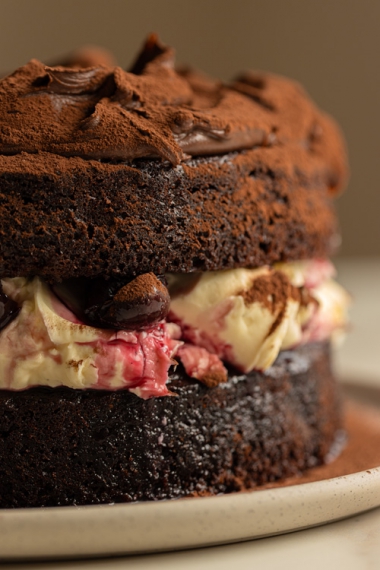
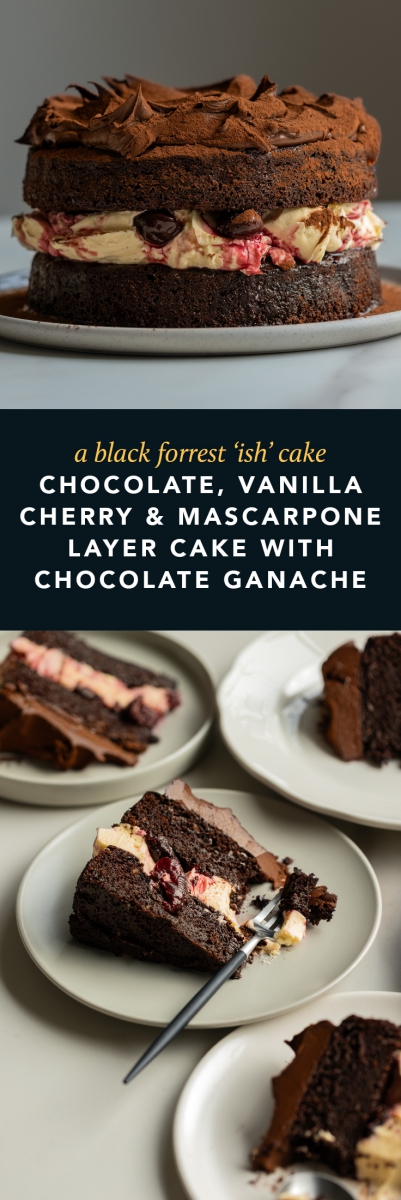
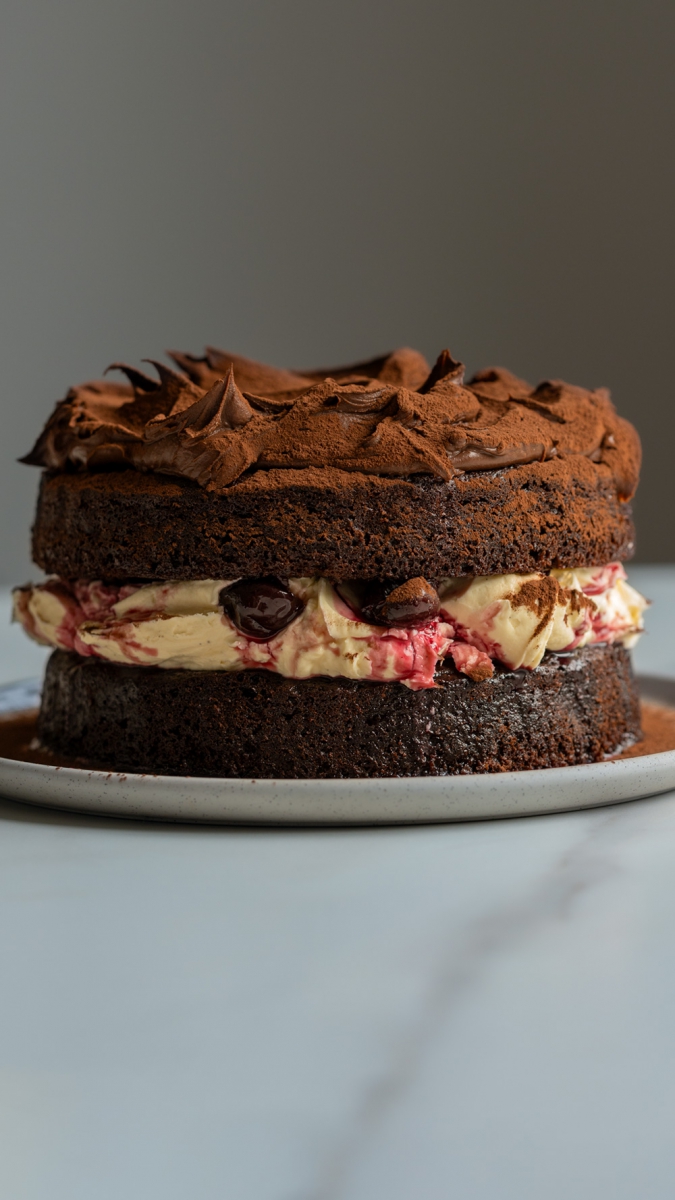
Here's a decadent Black Forest-inspired cake recipe that’s as delicious as it is gorgeous. It's my current "celebration cake" obsession and has graced the past four of our family birthdays—it's that good!
This cake is the perfect blend of rich chocolate, creamy mascarpone, and juicy cherries, all topped off with a decadent chocolate ganache (or a dusting of cocoa for a simpler touch).
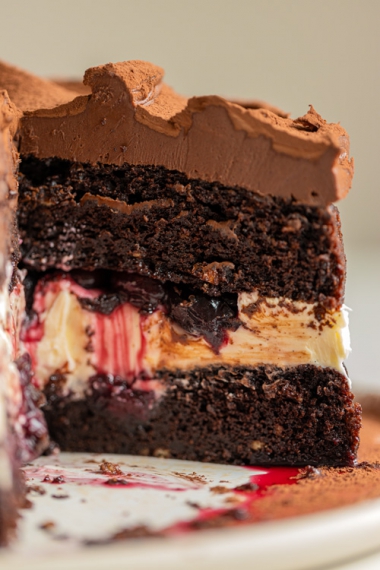
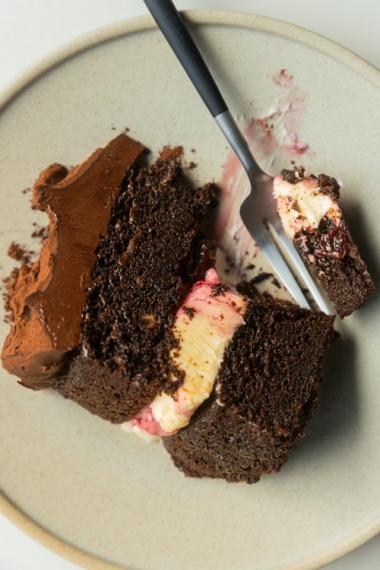
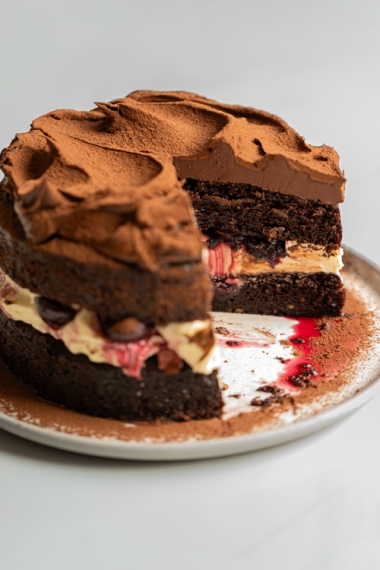
Each slice reveals layers of moist chocolate cake infused with coffee for a deeper cocoa taste, filled with creamy mascarpone and vanilla-scented cherries. And if you’re after something a little special, don’t skip the smooth and silky chocolate ganache (my kids' favourite part).
Not only is this cake a showstopper, but it's also fun to make. Plus, you can prepare some of the elements in advance, making the assembly a more efficient process.
I know you're going to love this one! Whether you're making it for a special occasion or just because, this cake is guaranteed to impress.
PS: I've also included an image below of the dusted cocoa version for reference.
PPS: If you love the look of this cake, you’ll also love this Chocolate & Passionfruit version too.
Let me know if you make it! @gatherandfeast

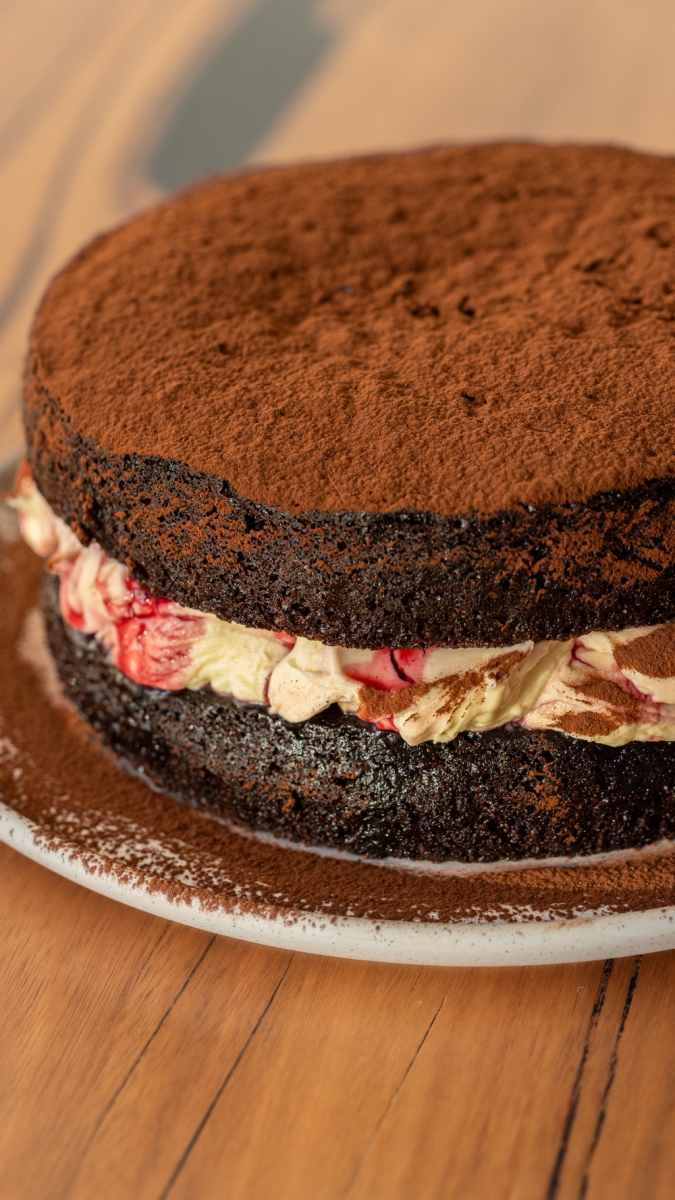
Alternate topping - final cake without the ganache, topped with dark cocoa ↑
Made easy with step-by-step videos to guide you through each step and help aid in the food styling process.
Fresh, healthy, simple recipes every night of the week!
Ingredients
 Gluten-free option
  45 minutes preparation time + 30 minutes cooking time (+ cooling and setting time)
  12
12 Chocolate cake
- 250g (250ml) (1 cup) buttermilk
- 160g (185ml) (3/4 cup) mild extra virgin olive oil
- 15g (1 tablespoon) vanilla extract
- 2 eggs
- 220g (1 cup firmly packed) brown sugar
- 110g (1/2 cup) caster sugar/granulated sugar
- 185g (1 1/4 cup) plain all-purpose flour
- 75g (3/4 cup) unsweetened dark Dutch-processed cocoa powder
- 2 teaspoon baking powder
- 1 teaspoon baking soda
- 1/2 teaspoon sea salt or kosher/cooking salt
- 185ml (175g) (3/4 cup) hot coffee (The coffee helps the cocoa 'bloom' and boosts the chocolate flavour. You can't taste the coffee in the end result, but if you prefer not to use it, simply substitute with hot water)
Vanilla cherries
- 250g frozen pitted cherries
- 60g (1/4 cup) castor sugar/granulated sugar
- 1 teaspoon vanilla extract or vanilla bean paste
Vanilla mascarpone filling
- 250g cream cheese
- 1 tablespoon vanilla bean paste
- 110g (2/3 cup) pure icing sugar, sifted if very lumpy
- 250g mascarpone
Chocolate ganache
You can omit this step and simply dust the top of the cake with dark cocoa. However, if you are making a celebration cake and want it to be more spectacular and decadent, the ganache is a stunning addition.
- 100g good quality milk chocolate, very finely chopped
- 100g good quality dark chocolate, very finely chopped
- 250g (250ml) (1 cup) thickened (heavy) cream
- 1 teaspoon vanilla bean paste or vanilla extract
- Small pinch of sea salt
For assembling
- 1 tablespoon dark Dutch-processed cocoa, for dusting
Method
Vanilla cherries
- Mix the cherries (from frozen or thawed), caster sugar, and vanilla in a small saucepan over medium heat.
- Once the sugar has dissolved, bring the mixture (that will have now formed) to a simmer. Allow to simmer for about 10 minutes until the syrup thickens.
- Set aside to cool. If needed, speed up cooling by placing in the fridge or freezer, checking frequently to avoid freezing. Store in an airtight container in the fridge if making ahead (up to 2 days).
Chocolate cake
- Preheat the oven to 180°C (350°F). Grease and line 2 x 20cm round cake tins with baking paper.
- In a large mixing bowl, whisk together the buttermilk, olive oil, vanilla, eggs, brown sugar, and caster sugar.
- Add the flour, cocoa, baking powder, baking soda, salt, and hot coffee. Whisk until smooth.
- Divide the batter evenly between the prepared cake tins.
- Place the cakes side by side in the oven.
- Bake at 180°C/350°F for 25-30 minutes, checking at 25 minutes. Cakes should be just cooked to stay light, moist, and fudgy.
- Once cooked, remove from the oven, and allow to cool completely. If needed, to speed up the cooling process, cool in the freezer (in their tins) after 30 minutes on the bench, checking frequently to avoid freezing. Once cool enough, remove from the freezer and place in the fridge or onto the bench.
Chocolate ganache
You can omit this step and simply dust the top of the cake with dark cocoa. However, if you are making a celebration cake and want it to be more spectacular and decadent, the ganache is a stunning addition.
- Place the very finely chopped chocolate in a medium bowl.
- Heat cream and vanilla in a small saucepan over medium heat until simmering.
- Pour the hot cream over the chocolate, ensuring all chocolate is covered. I like to use a spoon or spatula to push the cream down into and over the chocolate.
- Cover with a plate or pot lid to trap the heat and let sit for 5 minutes.
- After 5 minutes, whisk the mixture until smooth and silky.
- Set the ganache in the fridge for about 30 minutes, stirring every 10-15 minutes until it reaches a thick, spreadable consistency.
- Once it reaches a scoopable, spreadable consistency, remove it from the fridge and place it on the bench until ready to assemble the cake. You don't want the ganache too firm, as it will be hard to spread on the cake; it should be just firm enough to hold its shape while remaining easily spreadable. This step may take an hour or so for the ganache to set to the right consistency. You can use the freezer to speed up the process, but keep a close eye on it to prevent over-setting. It's much easier to achieve a beautiful, swooshy look with softer ganache.
Vanilla mascarpone filling
- In a stand mixer or using hand beaters, beat the cream cheese and vanilla until smooth.
- Add the icing sugar and beat until smooth and lump-free.
- Add the mascarpone and gently beat until just incorporated. I find mascarpone can be a little temperamental, so the less mixing, the better. If it gets overmixed, it can start to split or the consistency may not be as smooth. A few turns of the beater blade should be enough, or use a spatula to fold it in.
- Set aside in the fridge until you're ready to assemble the cake.
To assemble
- Ensure the cakes are completely cool.
- Place one layer of cake on a serving plate. Spread a scoop of cherry syrup over the cake.
- Dollop the mascarpone filling evenly over the first layer, then very gently spread it out with the back of a spoon, creating a subtle dip in the centre to help hold some of the berries and syrup.
- Evenly spoon the cherries and a little syrup over the filling. If you have lots of sauce, keep some for serving. Adding too much syrup can cause the filling to split or slide, so I find a couple of tablespoons is a good amount here.
- Place the second cake layer on top, gently pressing down to secure.
- Dollop the ganache (if using) over the top layer and gently spread it out with the back of a spoon, creating swooshes in the ganache. Alternatively, dust generously with dark cocoa.
- Finally, dust the cake evenly with dark cocoa.
Storage
- The cake can be served immediately or refrigerated for up to 48 hours before serving.
- If you make the cake a day or two in advance, the mascarpone filling might sometimes crack from the cherry syrup. If this bothers you, smooth it out with a spoon or offset spatula, or add a few more drizzles of the reserved cherry syrup right before serving.
- The cake can be served cold from the fridge or allowed to sit at room temperature for a few hours.
- Store any leftovers in an airtight container in the fridge for up to 4 days.
NOTES
- Substitute for buttermilk: If you can't access buttermilk, you can use 250ml (1 cup) of milk (whole or low-fat) mixed with 1 tablespoon of lemon juice or apple cider vinegar. Set it aside for 10 minutes to curdle, then use it as per the recipe.
- Gluten-free option: For a gluten-free version, use a gluten-free plain baking flour blend that can be used in a 1:1 ratio to plain flour. Brands like Bob's Red Mill (available in specialty stores or on Amazon) and White Wings (in supermarkets in Australia) work well.
- Hot coffee in chocolate cake: The hot coffee enhances the chocolate flavour but does not impart a coffee taste. If preferred, you can substitute it with hot water.
- Mascarpone handling: Mascarpone can become grainy if overmixed. Use gentle mixing and avoid over-beating to maintain a smooth consistency.
- Cherry preparation: Ensure the vanilla cherries and their syrup are cooled before assembling the cake. Excess syrup may cause the filling to become too wet.
- Optional chocolate ganache: You don't have to make the cake with the chocolate ganache. Instead, you can leave this step out and simply dust the top of the cake with dark cocoa. However, for a more spectacular and decadent touch, the ganache is a stunning addition, especially for celebrations.
- Chocolate ganache: Allow the ganache to set in the fridge until it reaches a spreadable consistency, stirring occasionally. This ensures it's easy to work with when assembling the cake.
- Assembly tips: To prevent the cake layers from sliding, ensure they are completely cooled before assembling. Creating a slight dip in the mascarpone filling helps hold the cherries and syrup in place.
Make-ahead tips:
- The vanilla cherries can be made up to two days in advance and stored in the fridge.
- Cake layers can be made the day before and stored in their tins in the fridge. Alternatively, they can be wrapped in plastic wrap (with baking paper left on) and frozen for up to a few weeks. Simply defrost before assembling.
- The mascarpone filling can be made the day before and stored in an airtight container or covered bowl in the fridge until ready to assemble.
- For ease of spreading, prepare the chocolate ganache just before adding it to the cake. Once it sets too firm, it becomes difficult to work with. If short on time, dusting the cake with cocoa and skipping the ganache is a quicker alternative.
Storage and serving:
- The assembled cake can be stored in the fridge for up to 48 hours before serving.
- If the cake is made a day or two before serving, sometimes the mascarpone filling may crack from the cherry syrup. Smooth it out with a spoon or offset spatula, or add a few more drizzles of reserved cherry syrup right before serving.
- The cake can be served cold from the fridge or allowed to sit at room temperature for a few hours.
- Store any leftovers in an airtight container in the fridge for up to 4 days.
Free Resources
Click on the links below to print or save this recipe to your device.
